Painting 3D-printed miniatures begins long before the first color is applied. Filament and resin models require different surface preparations to achieve clean results. Learn the right techniques for smoothing, priming, and finishing your prints. Avoid common mistakes and enhance your painting workflow with clear, practical steps tailored to your print material.
Printed minis are not equal. Painting filament vs resin miniatures requires different handling from the very beginning. Surface texture, detail level, and print artifacts all influence how you clean and prep each type.
Resin prints (often made with SLA printers) produce smooth surfaces and sharp details. But those details can be fragile, and excess resin or support marks often need careful attention. Start by:
Filament prints, typically made from PLA or PETG, are tougher but come with more visible layer lines. These need more surface work:
Both types benefit from a clean, dry surface before priming. If you skip cleaning, even the best primer for 3D printed minis won’t adhere well. Start clean = smoother painting ahead.
The smoother your surface, the better your result. For RPG figures, especially, where details matter, it’s worth putting in the time. So, let’s go step-by-step on how to prime 3D printed RPG models and achieve that perfect painting base.
Step 1: Surface smoothing
For filament:
This is the core of how to smooth filament before painting, especially important for rounded surfaces like cloaks and faces.
For resin:
Step 2: Priming
These steps not only support adhesion but also make your colors richer and more accurate. This is the core of resin surface prep for painting a clean and primed model lets every detail shine.
Choosing the right primer isn’t just about color; it affects durability, detail, and how paint behaves. So what’s the best primer for 3D printed minis? It depends on the type and scale of your miniature.
For filament miniatures:
For resin models:
If you’re working on larger terrain like modular castles or dungeon rooms, look for primers that stick well on large flat surfaces. Choosing the right primer = better adhesion + sharper paintwork.
Avoid glossy finishes during priming, as paints may bead or slide off, especially on curved resin areas. This is especially relevant in how to paint 3D printed terrain and minis, where material textures can be inconsistent.
Not all filaments are the same, and neither is resin. Understanding the differences between PLA, PETG, and standard resins will improve your prep work and final results.
PLA (most common filament):
PETG (less common but stronger):
Resin (standard photopolymer):
Knowing the differences in painting PLA and resin helps avoid surprises. A model that looks great raw might behave differently once you prime it. Remember: filament = more sanding, resin = more cleaning. Adjust your prep method based on the material and scale. It’s a big part of any RPG miniature painting surface tip worth knowing.
Fine details on 3D printed models can make or break your fantasy characters. After all the prep, your next job is to protect those details while painting. And this process also begins during the preparation stage.
To keep details visible:
Filament models often require additional smoothing around detail zones, especially in facial features or fingers. Use precision files if needed. This is one of the lesser-known but crucial filament miniature painting tips for RPG fans.
On resin models, let the material do the work resin captures tiny details well. Just make sure supports don’t damage delicate areas, such as blades or eyes. If they did, a dab of modeling putty can restore the shape before priming.
Proper prep = better paint flow. These painting techniques for fantasy miniatures make it easier to layer, wash, and drybrush small elements without compromising the model’s clarity.
Prepping miniatures for gameplay is different than prepping them for display. If your minis will hit the tabletop regularly, durability matters as much as detail.
Terrain in particular gets handled more. For this reason:
This applies across both FDM and resin prints. For terrain like trees, ruins, or modular dungeons, understanding how to paint 3D printed terrain and minis efficiently helps keep your campaign setup strong.
For character minis:
This is where resin post-processing before painting matters most. Skipping curing or rushing support cleanup leads to sticky areas that resist primer and paint. Always let your resin miniatures dry and cure completely.
Prep and patience = long-lasting, campaign-ready models. Whether you’re painting a dragon for the next boss fight or a merchant NPC for a side quest, proper prep helps them survive game night after game night.
Curing resin miniatures is crucial for creating safe, paint-ready models that withstand every tabletop session. If you’re printing fantasy minis for RPGs, skipping this step can ruin your results. Discover the correct way to cure, avoid common mistakes, and select the ideal setup for your workflow with practical guidance in this guide.
In every great fantasy tale, the forging of the weapon is only half the battle. Just as a sword must be tempered in fire, your freshly printed miniature must be properly cured before it’s ready to take its place in the world of your campaign.
When you remove a model from your resin printer, it is not yet ready for adventure. It looks complete, yes, but it still carries the softness and danger of unprocessed magic. What lies before you is a raw artifact, full of potential but not yet hardened by time and light. This is where curing 3D printed minis becomes essential. Curing is not just a final touch. It is a vital transformation.
By exposing your miniature to ultraviolet light, you complete the process that your printer began. This step locks in the details, eliminates stickiness, and makes the figure safe to handle. Without curing, the model stays vulnerable. It may warp, remain toxic to the touch, or refuse to hold paint.
The benefits of post-print curing for RPG miniatures are many. You gain a figure that is durable, solid, safe, and ready for the table. The sword arm will not sag over time. The wings of your wyvern will not turn soft in storage. The paint will adhere as it should, allowing your creativity to shine through every layer of acrylic.
It is in curing that the raw becomes refined. The statue becomes a hero. The battlefield piece becomes terrain worthy of a campaign. Without this step, your miniatures remain locked in limbo, forever unfinished.
It is one thing to expose your model to UV light. It is another to know when the curing is truly complete. Like any seasoned Dungeon Master, you must learn to read the signs.
A miniature that is fully cured will no longer feel sticky. The surface will be dry to the touch, with a more matte appearance. Run your fingers over the surface. If it feels smooth, clean, and firm, you are likely holding a finished piece. On the other hand, if there is any tackiness or shine, the process is not yet done.
Learning how to cure 3D printed miniatures also means knowing what to avoid. Over-curing can be as harmful as under-curing. If the model is left too long under strong UV light, it may become brittle. A delicate staff might snap. A cloak might crack. The goal is not just hardness but balance.
To check the integrity of your miniature, gently bend thinner sections. Do they give a little and then return to the place? That is a good sign. If they snap, the resin has become too brittle. If they remain flexible, it is undercured.
Understanding how to tell if a miniature is fully cured is a skill you will develop with practice. Different types of resin, varying mini sizes, and lighting conditions all play a role. Be patient, and test often. Once mastered, you will be able to confidently prime and paint your models without fear of paint flaking or details dissolving.
The moment your mini is cured and ready, it shifts from object to artifact. It becomes part of your storytelling arsenal. And from that point, the adventure can truly begin.
Every smith needs a forge. Every adventurer needs a base camp. And every miniature maker needs a reliable curing setup. Choosing the right one makes all the difference between rushed work and refined craft.
For those looking to cure quickly and evenly, a dedicated curing station is the most effective tool. These enclosed machines provide full UV coverage and usually include a rotating platform. That means every part of the miniature is evenly exposed to light. A curing station for tabletop miniatures helps eliminate guesswork and reduces the chance of missed spots or overexposure.
If you are working with a limited budget or a small space, a handheld UV lamp is a viable option. It allows you to control where the light hits. However, it also means more responsibility. You will need to rotate the model by hand and watch for uneven curing. For occasional printers or hobbyists printing one mini at a time, this method can still serve well.
Many creators also experiment with DIY curing setups, especially using UV LED tape or small custom enclosures lined with reflective surfaces. These can be surprisingly effective, provided the LEDs emit light within the proper UV wavelength range (typically around 405 nm) compatible with photopolymer resin. Before relying on any non-dedicated setup, always verify that the UV light parameters match your resin’s curing requirements. Otherwise, your models may remain tacky or undercured despite extended exposure.
Then there is natural sunlight — the original UV source. If you choose this route, place your miniature in direct light and rotate it every few minutes. In the middle of a sunny day, curing may take between fifteen and thirty minutes. The drawback here is inconsistency. Clouds, shadows, and shifting angles all affect the outcome. It works, but only if you are willing to stay attentive.
When considering UV curing for tabletop models, think about your workflow. How many miniatures do you print each month? How complex are their shapes? Do they have wings, shields, tails, or layers of terrain? The more intricate the model, the more helpful a station with 360-degree rotation becomes.
This step may not seem as exciting as the moment you remove the mini from the plate. But having the right tools, or carefully built DIY alternatives, means fewer mistakes, better results, and models that stand strong in the heat of battle.
Curing is the final step in printing, but it is not the final step in the preparation process. Especially when working with terrain pieces, large monsters, or complex creatures, there is more to be done before they are truly game-ready.
Once your miniature is fully cured, inspect it for support scars or leftover marks. Use a hobby knife or fine file to remove imperfections. Sanding works best on cured resin, as it won’t smear or warp the surface. Then, give the model one final rinse in warm water to remove dust.
For terrain models, this post-cure care is especially important. Buildings must sit flat on the board. Platforms must line up with ladders or stairways. Uneven or rough bottoms can cause wobbling or poor alignment. Taking the time to prepare the model means fewer problems during gameplay.
Larger monsters with wings, horns, or extended limbs may need reinforcement. After curing, you can use green stuff or modeling putty to strengthen joints or fill gaps. This prevents cracking later, especially if the model is frequently handled or transported.
When learning how to make minis game-ready after print, you should also focus on priming. A good primer locks in cured details and prepares the surface for paint. Choose a primer that matches your planned color palette and spray evenly from all angles.
For creators using terrain pieces with interchangeable parts, such as walls or floors, test the fits after the pieces have cured. Expansion or warping can occur if the model was overexposed. A small file or hobby saw can help adjust parts for better alignment.
Whether your creation is a castle ruin or a summoned elemental, finishing touches make all the difference. Cured models are strong, but well-prepared models become part of the world. They become landmarks in your story.
In the world of curing resin minis for DnD, even experienced creators can make mistakes. But knowledge is the best defense. Avoiding a few common errors will save you time, materials, and frustration.
One mistake is curing before cleaning. Resin leaves behind a thin layer of uncured liquid on the surface. If you skip the isopropyl alcohol wash and proceed directly to UV light, the resin will cure as well. The result is a rough, chalky finish that ruins detail and makes painting difficult.
Another common mistake is over-curing delicate parts. A longsword, wand, or spider leg may look solid, but too much UV can cause it to become brittle. These parts might break the moment you begin to paint or move them. When in doubt, cure in shorter sessions and inspect between each round.
Uneven exposure is another frequent error. This happens when a miniature is cured on one side but not the other. The surface may look fine at first, but later you find it is still soft underneath. This often occurs when you do not rotate the model or place it in a curing box that does not offer full coverage.
As part of the best 3D printed RPG mini curing tips, consider placing the model on a reflective surface like aluminum foil inside the curing box. This helps bounce light into shadowed areas. It can reduce the chance of uneven curing and make your process more efficient.
Avoid placing your curing setup near heat sources or in enclosed areas without ventilation. Heat can warp resin or cause unwanted expansion. Always work in a cool, dry space with clean airflow.
Learning from these resin curing mistakes to avoid will improve your results and help you build a more reliable workflow. Fewer failed prints. Stronger models. More time to focus on painting and storytelling.
Time is everything in curing. Too short, and the model remains soft. Too long, and the detail may become brittle. Finding the correct curing time for small resin prints is a key step in building high-quality miniatures for your party.
For models around 28 to 35 millimeters, typical of most fantasy campaigns, two to six minutes is usually enough in a curing station. But the number depends on more than just size. The color and type of resin matter. Transparent or lighter-colored resins cure faster. Darker resins often need more exposure.
For curing stations, begin with two minutes per side. Rotate often. Check the surface as you go. You can always add more time, but you cannot undo an overexposed figure.
If using a handheld lamp, double the exposure. Shine the light evenly across all angles, and check parts like the undersides of cloaks or inner shields. These are often missed and may remain soft if not properly cured.
With sunlight, be mindful of the environment. Rotate the model every five to ten minutes, and avoid leaving it out for too long. Direct sunlight may seem gentle, but over time, it can damage thin parts or alter alignment.
Adopting the best way to cure fantasy minis means paying attention to materials, timing, and positioning. There is no single recipe, but with experience, you will begin to see the signs.
And once your miniatures are cured with care, every detail will show on the battlefield. Every sword will hold its shape. Every dragon will cast its full shadow. And every player around your table will notice.
Forest ambush encounters add tactical depth to your sessions with layered terrain, hidden threats, and limited visibility. Using printable trees, ruins, and battlemaps, you can create interactive combat zones that challenge movement, strategy, and line-of-sight, all while keeping setup flexible and reusable across different campaign sessions.
Forest ambushes work especially well in 5e because they naturally slow movement, create line-of-sight restrictions, and offer both cover and concealment elements that can make even a standard skirmish feel tense and dynamic. Whether your players are escorting a merchant caravan or venturing into unknown territory, a well-placed forest ambush offers meaningful choices.
Tactical terrain = more interesting combat.
You can raise the tension by placing threats where the players least expect them. The key? Use forest ambush terrain for DnD that takes advantage of visibility layers, elevation, and interactive cover. Ambushers can lie in wait among logs, ruined walls, or rocky outcroppings, ready to strike.
If you want to increase the challenge and the fun, plan your encounter around:
A flat map won’t deliver this experience. That’s why using printable forest props for RPG helps you build memorable, reactive encounters your players will remember.
Not every forest terrain setup needs to be packed with detail, but a few smart pieces go a long way. A simple layout of trees and ruins can become deadly when the right terrain is used. If you’re wondering how to build woodland encounter terrain, start with printable pieces that offer cover, concealment, and visual storytelling.
Essential STL files for ambush scenes include:
This is where terrain does more than just decorate; it becomes an integral part of the gameplay.
Adding a ruined forest terrain STL bundle lets you shape tactical flow. These models create natural chokepoints, elevation for ranged attackers, and hiding spots for traps or enemies. Since many STL files are modular, you can rotate or swap pieces between sessions, keeping your players guessing.
Using STL terrain = reusable setups for different campaigns.
Whether you’re printing large trees or overgrown ruins, make sure they align with your combat goals, defensive cover, blocked paths, or ambush trigger points. It’s not just scenery; it’s part of the encounter.
Modularity is key when you want to reuse your terrain without having to repeat the same setup. With interchangeable parts like trees, rocks, and elevation pieces, you can build flexible ambush zones. Start by collecting STL trees and rocks for tabletop terrain that scale to standard 1-inch grids used in most RPGs.
Use larger tree trunks near map edges and place smaller vegetation near the center. This creates a layered scene that naturally draws players inward, where ambushers might be waiting.
Here’s what a modular forest encounter for 5e can offer:
By combining battlemaps with printed props, you unlock freedom to adjust scenarios based on party level or narrative pacing. Want to change the battle difficulty? Add or remove cover. Need a faster flow? Swap in open ground tiles.
That’s the advantage of modularity it grows with your campaign.
And if you’re looking to expand even further, some terrain sets include broken carts, ruins, or campfires that can reinforce the ambush narrative while keeping your board flexible and fresh.
Ruins aren’t just visual markers; they can change how players and enemies see the battlefield. Place broken walls between trees or line them up with elevation pieces to create sightline blockers. These are great for designing ambush scenarios with STL terrain because they allow enemies to hide, snipe, or split the party.
What makes ruins powerful in combat?
Control over movement and vision
A forest filled with ruins, stumps, and foliage isn’t easy to run through. Movement becomes cautious. Characters use cover. Players start asking questions like, “Is anyone behind that wall?” or “Can I climb that rock?”
Add forest ruins for fantasy campaigns to:
Unlike a city street, forest ruins are uneven, half-buried, and organic. When printed, they blend with the rest of your terrain seamlessly. That makes every square on your map worth examining closely.
Your players may try to flank. Or they might walk into an ambush with no idea who’s waiting. Either way, you’re giving them an environment that requires choices, and that’s the kind of engagement every DM wants at the table.
The visual base of your ambush scene is just as important as the 3D props you place on top. That’s where fantasy forest battlemaps and terrain come in. A solid battlemap provides the flexibility to accurately mark elevation, pathways, and tree placement, keeping the game flowing smoothly.
Here’s how to lay out a successful forest trap zone:
A good building of a forest trap zone for RPG starts with considering movement and sight lines. Set traps along narrow paths. Place enemies behind ruins. Use elevation to break up visibility. The map should force players to react.
Printable maps with fog layers, streams, or overgrowth add depth. The more natural your ambush zone feels, the more cautious your players become. That hesitation makes the encounter more intense even before initiative is rolled.
And if your terrain is modular, you can switch out tiles between encounters, giving you a different challenge without redesigning everything.
Integrating new terrain into an ongoing campaign map isn’t just possible; it’s often easier than it looks. Whether your players are traveling through familiar woods or discovering new ones, blending in RPG terrain for forest combat works best when you consider continuity.
Ask yourself:
By using trees and roots for DnD maps that resemble earlier environments, you create visual consistency. That builds immersion and reduces confusion at the table. If they’ve been here before, players will recognize terrain. If it’s new, they’ll still feel grounded in your world.
A good trick is to reuse props but rotate them or group them differently. That makes familiar pieces feel fresh again. You can also swap canopy tops or repaint elements to accommodate seasonal changes, such as green in summer and brown in fall.
And finally, don’t overfill your map. Leave breathing room so movement, attacks, and roleplay don’t get crowded out by terrain. Let the environment shape decisions, not block them.
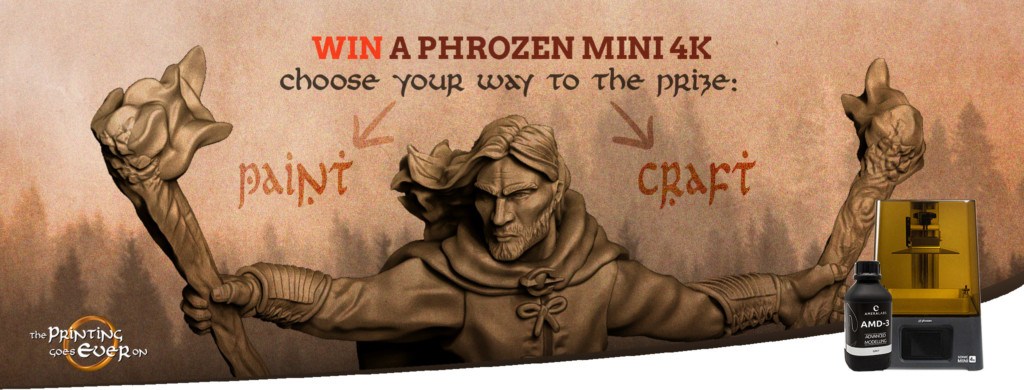
We are happy to announce that from the 2nd of November all 3d miniatures, fantasy, and tabletop games fans can try their hands at creative struggles! Join our contest and win your 3d printer! Up to the 30th of the same month, you’ll get a unique chance to wipe the dust off your art equipment and keep the creativity muscles a-pumping. Express yourself freely, prepare your 3d miniatures, and create a work that will pave your way to victory!
Contest agenda:
1. Competition theme and conditions for participation
2. Contest categories
3. List of prizes you can win
4. Bonuses for all participating tabletop games fans
5. Where to post photos of 3d miniatures and dioramas
See also: How to Paint 3D Miniatures?
The competition falls into two main categories. You may paint your way to the prize or craft it. The choice is yours! Remember though – there’s a theme your work must relate to. In reference to dark times we live in, we decided the most appropriate will be: THERE IS ALWAYS LIGHT IN SHADOWS. To take a chance you need to be our Patreon and use models from any of our Patreon’s Chapters in your work. You may print your 3d minis or buy them from one of our licensed merchants. At this link, you may sink into the detailed rules of the competition (which’s highly recommended if you’re about to join!).
A painter’s quest is to paint one 3d miniature and put it into the theme’s context playing with details, colors, lights, or base. Experiment with your vision and reveal the light!
A craftsman’s task is to create a whole scene around the theme using the items you see fit with at least three of our Patreons’ miniatures included.
If you prefer the Art of Word – we’ve also prepared something for you! The contest for best written and creative comment is held on our Fanpage as well, so prepare your quill… Or keyboard, of course, and click HERE to create one! As a prize, you’ll get a custom miniature (pre-supported STL or 3d print)!
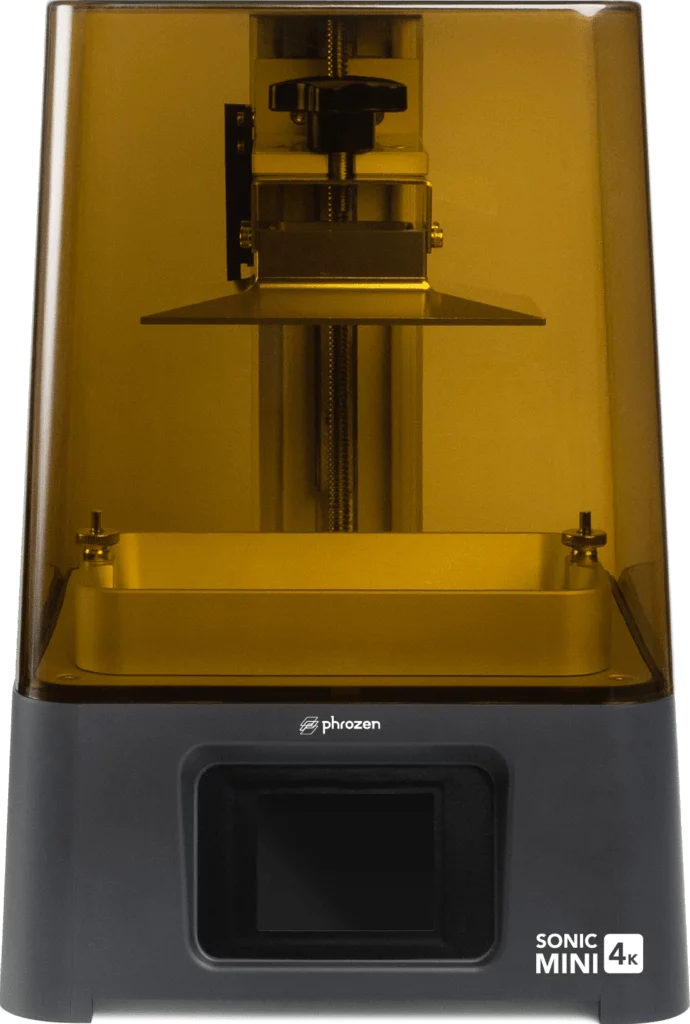
In the beginning, we’ve planned only one printer in the contest prize pool. However, grateful for our Patrons’ commitment and support of our project, we’ve decided to add another one. From now on there will be not one, but TWO Phrozen Sonic Mini 4K Resin 3D Printers as the main prizes! Overall, the prizes for individual places are divided as shown:
PAINT YOUR WAY CATEGORY:
Golden Ray (1st place): Phrozen Sonic Mini 4K Resin 3D Printer + bottle of 4K resin “Aqua-Gray 4K” + free shipping + free Patreon month
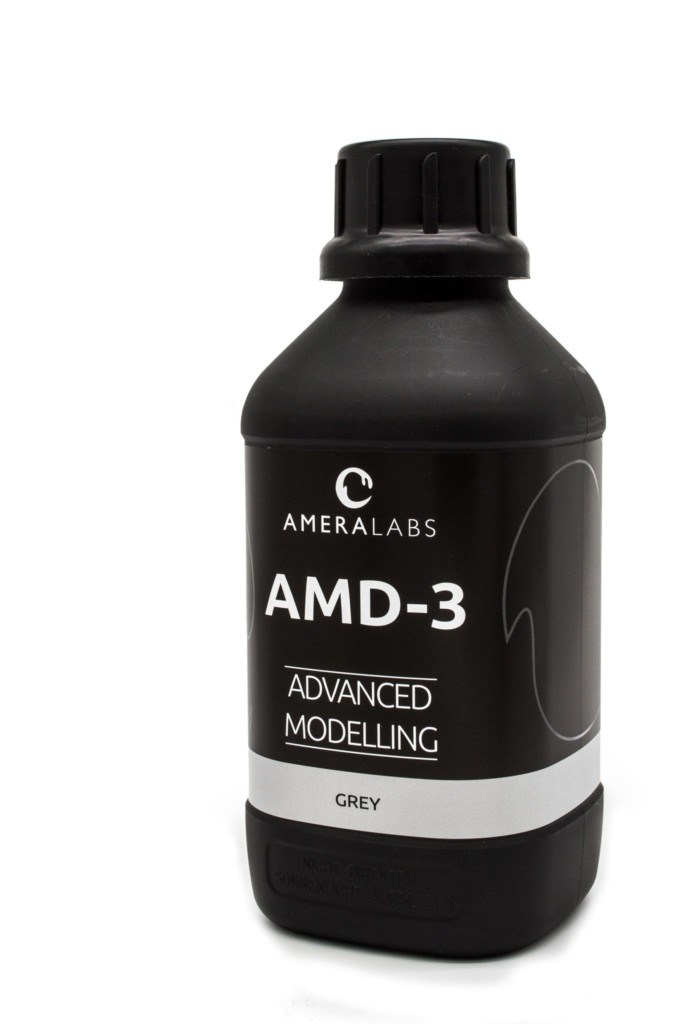
Silver Ray (2nd place): Voucher for one custom, colored illustration from Saturday Arts + 1L of AmeraLabs AMD-3 grey resin + free Patreon month
Brass Ray (3rd place): Free Patreon month
CRAFT YOUR WAY CATEGORY:
Golden Ray (1st place): Phrozen Sonic Mini 4K Resin 3D Printer + bottle of 4K resin “Aqua-Gray 4K” + free shipping + free Patreon month
Silver Ray (2nd place): 1L of AmeraLabs AMD-3 grey resin + free shipping + one gaming mat of your choice from https://geekvillain.co.uk/ + free shipping + free Patreon month
Brass Ray (3rd place): Free Patreon month
ART OF WORD COMMENT CONTEST
Golden Quill: the winner gets his hero miniature custom sculpted, as described in the comment – available as a pre-supported STL model or 3d print!
As you probably know, all our Patreon’s supporters gain a 30% discount for all stl models from our store. Now we’re offering an additional 20% discount for each contest participant! In total, that means 50% LESS PRICE on products from our store for all contestants!
All contest entries on Facebook should be added in comments, under the post right here.
As for Painters and Craftsmen, it will be photos of your prepared works. For Writers, it’ll be a sparkling, original comment.
You may also join the contest on Instagram where you can mark your competition entry as #waytotheprize and tagging @theprintinggoeseveron so we don’t miss your post.
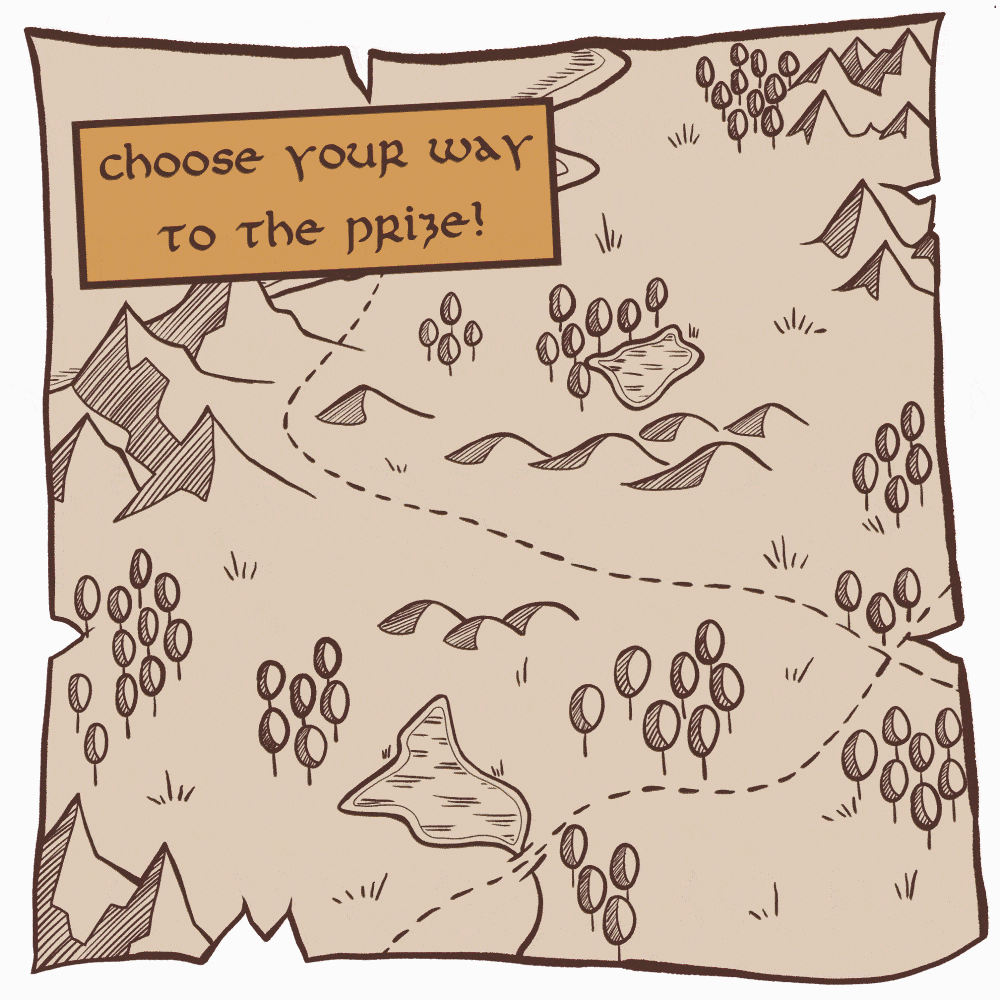
Join our contest and choose your way to win a Phrozen Sonic Mini 4k!
We’re excited to announce that on the 2nd of November the event begins. Up to the 30th of the same month you’ll get a unique chance to wipe the dust off your art equipment and keep the creativity muscles working. Express yourself freely and create a piece that will pave your way to victory!
The contest falls into two main categories:![]() PAINT YOUR WAY
PAINT YOUR WAY
As a painter you’ll bring a spark of life into your miniatures using your paints and brushes.
![]() CRAFT YOUR WAY
CRAFT YOUR WAY
As a craftsman you’ll create an awe inspiring scene filled with elements reflecting your vision.
If you prefer the Art of Word – we’ve also prepared something for you! The contest for best written and creative comment will be held on our Fanpage as well, so stay tuned and brace your quill… Or keyboard, naturally!
To make this whole thing even more interesting, we added a theme to this competition. Your job will be to put your plans and ideas into this context. You’ll get armed with all necessary information just before the contest begins.
Stay with us as the contest starts very soon!
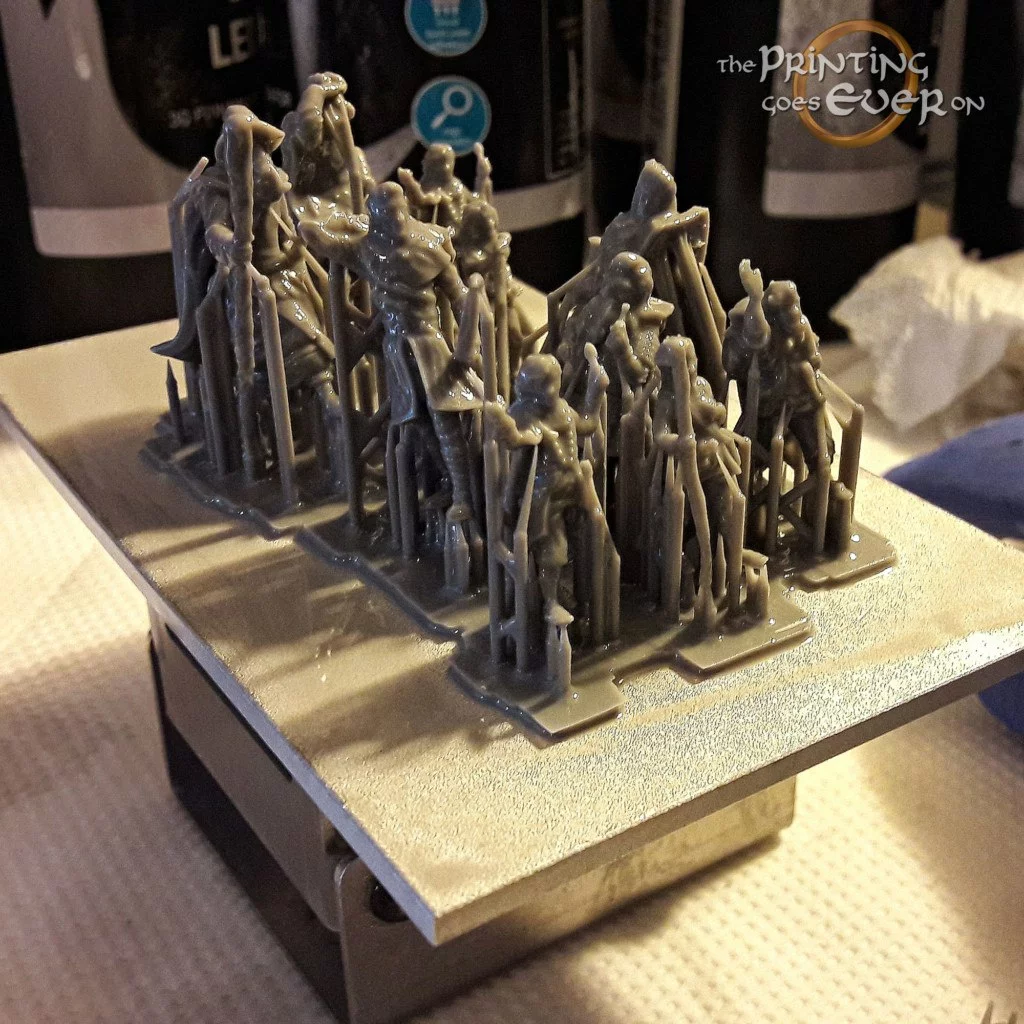
Most 3d printable miniatures are available only as clean STL files. However, recently more and more Patreon creators started to offer presupported models. Why does it even matter? What are those “supports” about? Are all supports equal to the other? In this text, we’ll explain why exactly they’re so important if you’re up to print your miniatures and what you gain paying for it.
Basically, the 3d printing process turns a whole object into many teeny-weeny slices and then places them one above the other, from the bottom up, slice by slice. Sounds easy, doesn’t it? The problem comes, when objects are suspended in space. How in fact may we print a hand hanging loosely? Or a tail waving happily above the ground? That’s when pre-supports pick up the pieces. Literally. Presupporting your 3d miniatures with all those towers-looking constructions and placing them below drifting objects, you help your 3d printers to print all minis out infallibly.

That’s exactly the case with our 3d printable miniatures. The pre-supports in our company are projected this way by Heydash Workshop. All printed miniatures are tested twice both by him and later, in the company headquarters. Thanks to this solution there’s almost no chance for any errors in our STL files. After countless pre-supported models, Heydash Workshop got to a world-class level. You can check out some free pre-supported minis from Heydash at his Thingiverse profile.
It’s a huge time saver to have a full build plate instantly, without any support work! You may become our Patreon or buy some high quality, pre-supported STL files in our store and spend those saved minutes on painting your pile of shame!
In order to save you the trouble, we decided to cover the topic of all file types you will get in monthly packs.
The meat and bones of each release, the precious STL files for our 3d printable miniatures.
If a model is larger than a normal humanoid, it will usually be split into keyed parts. Each part will be provided as pre-supported and clean models, following the guideline mentioned above.
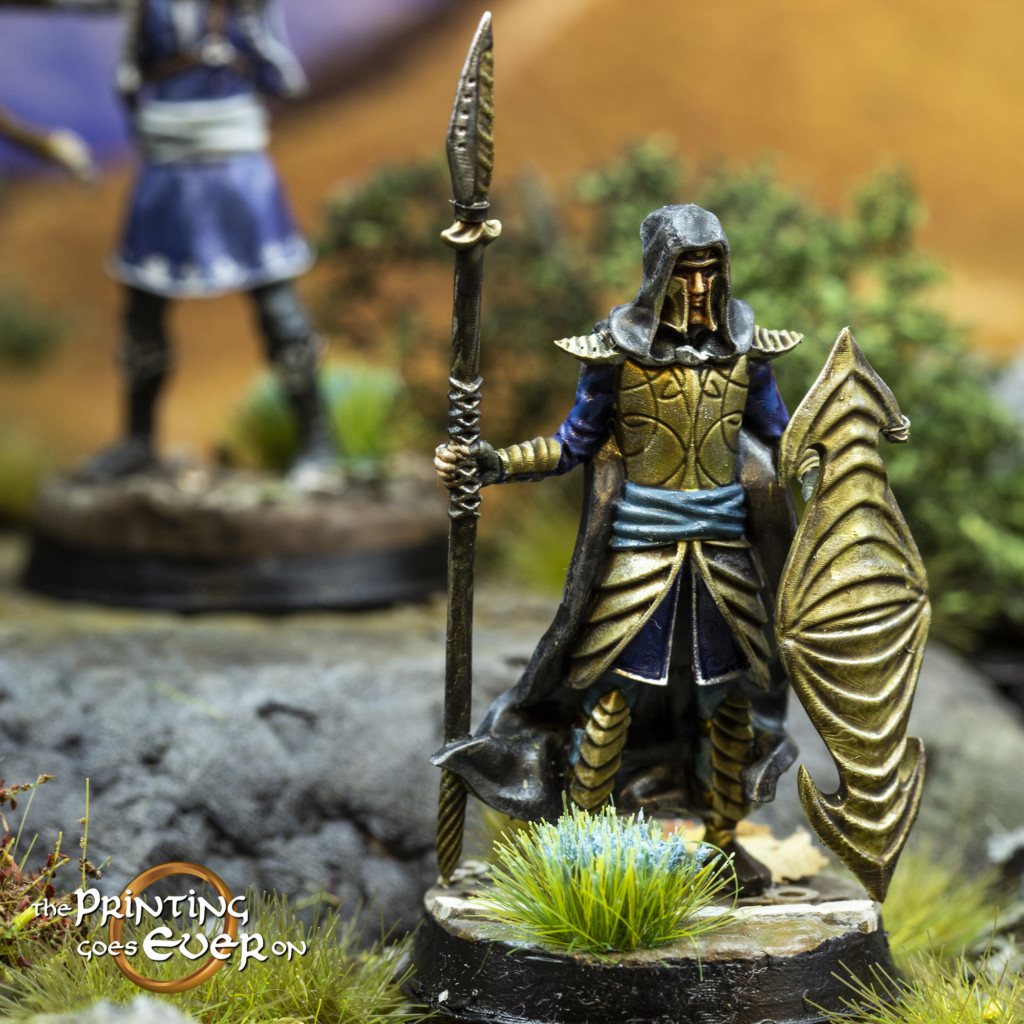
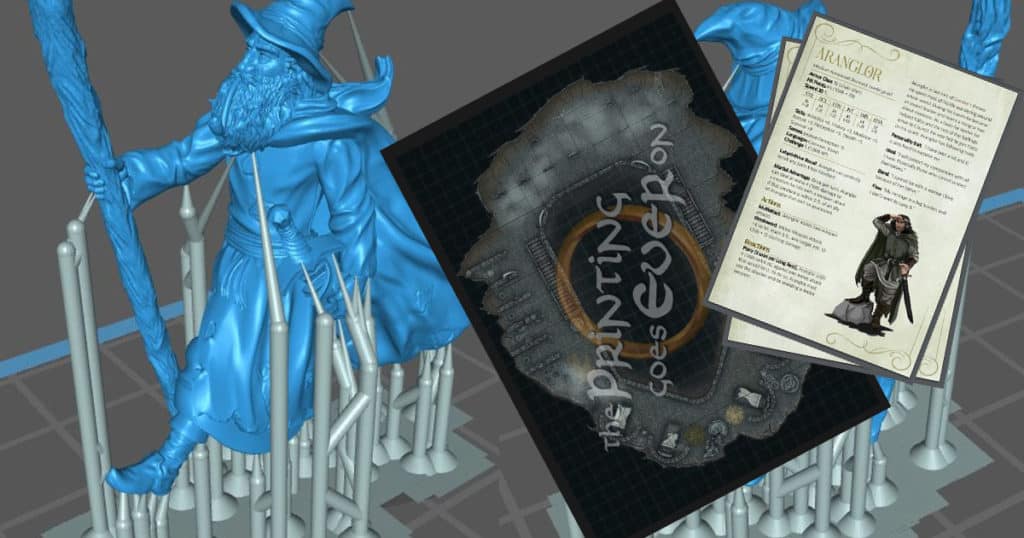
You don’t have to be playing the Adventures in Middle-Earth RPG to appreciate the characters and models. You can absolutely use the D&D 5e statblocks in your campaign, so you have unique monsters or awesome NPCs at hand!
The statblocks are developed by Jakub Bańka, using a custom designed template by Wiktor “Chochlik” Zaborowski and come with colored concept illustrations by the amazing Jane Saturday, or renders of the models transformed into illustrations.
Moreover, if you got bored with mundane dungeons, we got you covered. Each release contains a square grid battlemap (or battlemaps!) that fits the given theme or chapter. You can even play out some of the iconic scenes from the books we all love!
What’s more, you can just plug them into Roll20 and have fun with your friends online.
For general info about The Printing Goes Ever On, proceed here.
If you’d like to find us elsewhere, here are some links:

We, Maksym Mikołajczyk and Nelly Pietruszewska, are starting a Patreon that will be focused on making tabletop 3d printable miniatures. We will be creating characters and creatures (with some terrains too, if possible) inspired by classic fantasy novels. Moreover, in our designs, we focus on modest, believable style, in contrary to common exaggerated embellishments and proportions present on other 3d minis.
The key feature of this Patreon is chronological continuity. We won’t be creating random assortments of characters or D&D classes. This also means repetition of some characters in different poses and with changes in equipment.
Each month, patrons will receive:
File types provided in the packs are covered in this post.
Instantly after subscribing, you gain access to the Welcome Trove, holding nine miniatures of the heroes, who bravely set out on the Journey. Each model is equipped with a D&D 5e statblock, plus a bonus battle map to house them.
You can take a sneak peek at the Welcome Trove work in progress.
To guarantee you never lose your files, we decided to host a webshop with our 3d models. You can login using Patreon and “purchase” the pack using the 100% discount code you will get each month.
As we are not sure the system will be generally accepted, we will also provide a G-Drive link for the first release.
We encourage you to voice your opinion on the system we provide the files in, so we can develop it further. One major improvements we see are monthly Credits you can exchange for files from previous releases, if you don’t like the current pack.
You can follow us on our social media for regular updates regarding our 3d printable miniatures.